Creating Azure Application for REST Client
To log in to the device through REST API, you need to create an Azure Application that represents your REST client and grant this application access to the Azure Application that represents device.
|
➢
|
To create an Azure Application for REST client: |
|
1.
|
Sign in to the Azure portal using your organization's Microsoft account. |
|
2.
|
If your account gives you access to more than one tenant, click the Directories + subscriptions filter  icon on the toolbar to select the tenant in which you want to register an application. icon on the toolbar to select the tenant in which you want to register an application. |
|
3.
|
From the Navigation pane, select  App registrations, and then click New registration. App registrations, and then click New registration. |
|
4.
|
Under the Name group, enter a meaningful name for the application (e.g., "My REST Client"), leave 'Redirect URI' empty, and then click Register. |
|
5.
|
From the Navigation menu, select Overview, and then make a note of the 'Application (client) ID' and 'Directory (tenant) ID' values; you will need them later. |
|
6.
|
From the Navigation pane, select  Certificates & secrets, and then click New client secret. Certificates & secrets, and then click New client secret. |
|
7.
|
Enter a description for the new secret, select the expiration time, and then click Add. |
|
8.
|
Copy the value of the generated client secret and store it for future use. |
|
9.
|
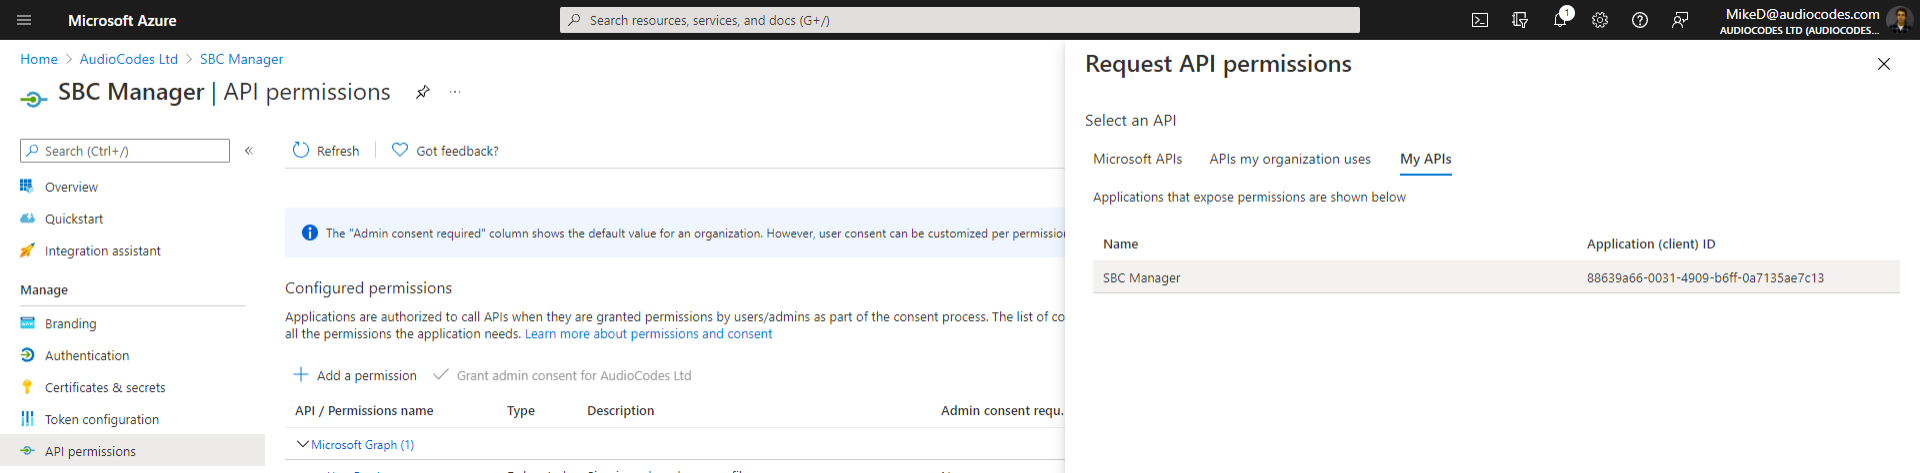
From the Navigation pane, select  API permissions, and then click Add a permission to add new permission. API permissions, and then click Add a permission to add new permission. |
|
10.
|
Click the My APIs tab, and then select the Azure application that represents the device (e.g., "SBC Manager"): |
|
11.
|
Select Application permissions, choose an appropriate role (e.g. , Administrator), and then click Add permissions. |
|
12.
|
Request from your Azure Directory administrator to grant admin consent to your app permissions. |
|
13.
|
Wait until your Azure Directory administrator completes the task and then verify that the status of your application permissions changes to "Granted". |